The little Plug that could
Tue 12 February 2013
The plan to get a PogoPlug and a WDTV Live was arrived at after an absolutely frustrating week spent lugging my external hard disk from the computer to the TV to the computer and back again, ad nauseum. I knew then that I needed to plumb for a NAS device that would allow me to access my external storage from my laptop, from my wife's laptop, from the TV, and from any other peripherals that I would get in the future. I also wanted to be able to stream music from the external storage drive to my A/V system. Finally, I also wanted to be able to access my files remotely and setup a low-cost 24/7 torrent downloader.
After weeks of searching and reading up on different systems, the choice of storage server came down to 2 - the Synology D212j NAS or the PogoPlug, and the A/V hub came down to a choice between the WDTV Live or the Popcorn Hour.

One of the key factors that tipped the scales in favor of the PogoPlug was very obviously cost - INR1300 for the PogoPlug (ordered from Adorama US vs. INR17,500 for the Synology D212j. I'm sure the Synology is worth every penny of its price (though it does burn that the very same model is available on Amazon for USD199 or just INR10500), I was also skeptical of putting in such a large investment for what is a device that is focused primarily on storage alone.
That brings me to the second reason why the PogoPlug was favored - ArchLinuxARM.

A customized distribution of ArchLinux available for the PogoPlug, with nearly all the packages/programs that I was interested in - Webmin, minildna, Transmission, Samba support, Dynamic DNS support and built-in support for Apple HFS+-formatted drives. I also wanted to look at setting up streaming support for my Nexus 4 phone and at implementing a VPN/SSH Tunnel solution so that I could add a security layer when accessing the Internet through my phone or from any public wireless point.
The decision process to arrive at the WDTV Live was also heavily influenced by price. The WDTV came to INR3800 (ordered from a US website - Centrix International), in comparison to the INR12000 that was being asked for the Popcorn Hour here and surprisingly, against the INR7800 that the same WDTV model was being sold for in India. The sweetener on the WDTV Live was the fact that at its price, it also came included with 802.11n WiFi out-of-the-box. This would help me wirelessly access my media content on the Samsung TV, and in lieu of which I'd be forced to depend on what many reviews say is a very unreliable Samsung WiFi dongle.
That was the end of the whole planning and purchasing process. The next step was to setup the devices. The WDTV Live is very straightforward to setup - power it up, connect to your WiFi network, enter your login credentials and you're up and running. The box automatically detects if any network storage or media server is attached on the local network. If you've already set that up, just connect and all your content is ready to access.
Setting up the PogoPlug with ArchLinux ARM is a slightly more involved yet straightforward process. Just remember to follow the online instructions1 to a T. Before you start however, I'd recommend that instead of using a flash drive as is recommended by this (and many other) instructions, use a small portable HDD instead2. There are two (linked) reasons that I'd recommend this
- Flash drives, especially the el-cheapo ones that most of us have lying around are not suited for the regular read/write cycles that are necessary for booting up and installing additional packages. Basically this means that it will fail, sooner rather than later
- Secondly, when you install the Archlinux boot partition, the standard procedure is to install it on a filesystem-type called Ext2, which is considered archaic because it does not have many of the features that modern filesystems have
- Anyways, what is relevant here is the fact that Ext2 filesystems are prone to corruption if not shut down properly. Given the poor state of power in India, you ARE going to be faced with a power cut and the Ext2-based PogoPlug not booting properly (hope you can hear the hard experience here!).
- The solution is to upgrade the Ext2 filesystem to a more-robust filesystem called Ext3 using the instructions here3. However, Ext3 is even more hard on flash drives because the error correction and journalling features of the file system result in more read/write cycles on the flash drive (resulting in a greater chance of error)
To summarize. Install the ArchLinuxARM on a small portable HDD and ensure that the filesystem is upgraded to Ext3!.
Once you're done with the installation and logged into your spanking new ArchLinuxARM-based PogoPlug, the next step is to setup the packages you require. I'll only touch upon the ones that I've installed. The first and most important package to install is Webmin, primarily because one this is setup and running properly, changing settings on your PogoPlug becomes much more easier. The first command to run is:
pacman -Syu
Pacman (the Archlinux package manager) is the command used to install/uninstall programs on ArchLinuxARM. The command above will update the pacman database that contains details of all the programs available, and then it updates all the installed packages on the system. It's good to do this because the individual packages are updated typically, at a faster rate than that of the entire OS, and therefore some packages may not be in sync with the latest versions available.
Once the packages have been updated, the next command to issue is
pacman -S webmin
which starts the installation process for Webmin. Once the installation is complete, we need to go in and customize the settings, which should be available at /etc/webmin/miniserv.conf. Fire up your favorite text editor with:
nano /etc/webmin/miniserv.conf
and then change the follow settings:
- the web address at which Webmin can be accessed on your local network. Just change this to the IP address assigned to your PogoPlug by the router5
- the port at which you want to access the Webmin administration page. The standard port is 10000
- whether you want to access the page through a secure (HTTPS) or insecure (HTTP) connection. Always best to go with the former in my opinion. For this option change or add ssl=1
- whether you want to allow only specific IPs to access Webmin. Add them here allow= or set this as allow=0.0.0.0 if you want anybody to be able to access webmin remotely
The next thing you want to do is ensure that Webmin starts off every time you boot the PogoPlug. To do this, just run the command
systemctl enable webmin
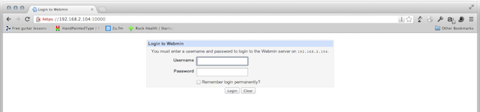
which will ensure that your webmin installation starts automatically when the PogoPlug is switched on. To check if all is hunky-dory, go to the Webmin administration page which should be available at 192.168.X.X:10000 (or the specific IP address assigned to your PogoPlug, appended with :10000, which is the standard port for accessing Webmin).
The next important package that I installed was minildna, which acts as a low-resource media server, streaming video, audio and photos to the WDTV Live. To install, just issue the following command:
pacman -S minidlna
Once the installation is complete, you need to go into the installation file available at /etc/minidlna.conf and change the following settings:
- the web address at which minildna can be accessed on your local network. Just change this to the IP address assigned to your PogoPlug by the router5
- the port at which you want to access the minildna status page - which you can use to keep track of whether the program is scanning your media directories properly and updating the number of videos, songs and pictures that can be streamed to your receiver
- the rate at which minildna updates its database - its best to keep this at the default level because I've had issues with the database getting updated properly when I tried fiddling with this number. The defaults should be satisfactory. To update this, modify notify_interval=
Like webmin, you want minidlna to start every time the PogoPlug does. Run the same command as above with just the name changed so
systemctl enable minidlna
To ensure that minildna starts updating its media database also issue the command
minidlna -R
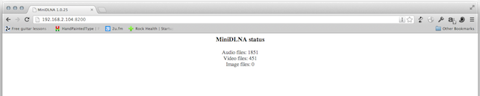
which starts that process off. This is also a useful command to run when the program does not seem to update your database as frequently as you want it to. The database updating is usually fast, my library gets updated in around 4-5 mins. To check whether minidlna is working fine, go to its status page which should be available at 192.168.X.X:8200 (or the specific IP address assigned to your PogoPlug, appended with :8200, which is the standard port for accessing minidlna).
Transmission is the next program that I went on to install. It's a lightweight torrent system that runs in the background. Again, pacman makes installing it a breeze.
pacman -S transmission-cli
and you'll soon have the program installed and ready. A quick visit to ~/.config/transmission-daemon with your text editor and change of the web address, port and download directories later, you will have a fully-functioning torrent downloader ready for your command4. You can access the Transmission administration page at 192.168.X.X:9091 (or the specific IP address assigned to your PogoPlug, appended with :9091, which is the standard port for accessing Transmission) and looks like below:

The Samba package is installed using the command
pacman -S smbd
Why Samba? Because its a networking protocol that makes it easy for Windows (and even Mac) computers to access the PogoPlug without any extra software or having to boot up a webpage. With Samba, you can login to the PogoPlug and use it as a network drive very easily.
OK, now that Samba has been installed, you need to change the configuration file available at /etc/samba/smb.conf. The main settings to change here are:
- The name by which you want the PogoPlug to be be identified when you connect to it from your computer. For this, change workgroup=
- The network addresses that can access your PogoPlug. Since I only want this to be available on the local network, I've set hosts allow = 192.168.1. 192.168.2. 127.0.0.1 Please customize this to the specific sub-net class that you use for your local network
- Finally, the directories on your PogoPlug that you want to share over the network. In my case, I've restricted this to my media folder and my home folder (accessible at /home/Your_User_Name) so that I (or whoever else I provide access to) doesn't accidentally delete or overwrite an important file. The media folder access is self-explanatory and the home folder access is so that I can put documents and other files that I want to be able to provide to everyone. You can change these settings under the Share Definitions section of the configuration file
We're nearly at the last step now, which is to install a Dynamic DNS service on the PogoPlug. Why? As you might have noticed so far, the network addresses at which the PogoPlug and the different programs that we've installed so far are accessible only using the address form 192.168.X.X, which is the IP provided by your router. However, this address is only accessible within your local network. So if you want to access the PogoPlug and the different program configuration webpages (or your own website hosted on the PogoPlug) from outside your local network, you'll need a Dynamic DNS program.
What this program does is that it takes the IP address provided by your router, and updates a remote server. This remote server provides you with an easier to remember name such as XXX.no-ip.org (where XXX is the name that you've assigned to the PogoPlug and where no-ip.org is your Dynamic DNS provider. In my case, it is no-ip. So when you put in the address XXX.no-ip.org (which is the unique address that you register on the no-ip website), their server checks the last updated IP provided by the PogoPlug and redirects your request automatically to that address. So now you can access Webmin, for example, at XXX.no-ip.org:10000 instead of 192.168.X.X:10000 (where the latter is the IP address assigned to your PogoPlug on the local network).
This is very useful in my opinion. To setup 'no-ip.org' as the Dynamic DNS provider on your PogoPlug (the instructions for this are specific to this provider. For another provider, please refer to their particular installation procedure), enter the command:
pacman -S noip2
The installation procedure is very straight-forward (ensure that you've already registered on no-ip before you start however!) and you should have it up and running. To check whether everything is fine, go to XXX.no-ip.org:10000 and you should now be presented with your Webmin login page!56
The next step in my installation procedure is to check that I can access my HFS+-formatted drive. This requires a little bit of fiddling because HFS+ support in ArchLinuxARM (actually Linux itself) is temperamental. To mount your HFS+ drive in read-write mode, enter the following command on your PogoPlug:
mount -t hfsplus -o remount,force,rw /mount/point
Change the /mount/point to the name of the directory that you want to mount to and also add the exact device location (of the type /dev/sdX, where X will be unique depending on your computer). There is an option to add the HFS+-drive automatically when you boot the PogoPlug (by editing your /etc/fstab file) but I choose not to do this because I've noticed that it slows down read-write on the PogoPlug considerably.
OK. Now we're getting closer to the horizon of this mammoth post. As I mentioned earlier, I also wanted to setup streaming support for my Nexus 4 phone so that I can access my music library from anywhere.7. This means that I need to setup a UPnP-compatible client and server. Checking the reviews for good clients online, I came across the Bubble UPnP client for Android and the Bubble UPnP server for ArchlinuxARM. Setting up the client is dead-easy but the server is much more fiddly unfortunately.

The process that I followed was to download the program from the Bubble UPnP server website. The next step is to download the Java installation for ArchlinuxARM because the Bubble UPnP server uses this. For my version of the PogoPlug, I had to run the following command:
pacman -S openjdk6
which installs all the Java files required. In my installation, I also had to run the following command
ln -s /usr/lib/libffi.so.6.0.0 /usr/lib/libffi.so.5
to solve a file location error that cropped up.
Now to check whether the Bubble UPnP server is working, change to the installation directory and run the command
sh launch.sh
which should start off a large screen full of information if all is well.

Then navigate to localhost:58050 or 192.168.X.X:58050(or the specific IP address of your PogoPlug) to access the configuration page of the Bubble UPnP server. Setting up access to this server on the Bubble UPnP client on my phone is pretty straightforward. Just follow the on-screen instructions and you should be ready to go.

I have to admit, it's quite a kick to be sitting in a coffee shop somewhere and have your music library streaming over the phone!
Note that this setup means you have to manually start the Bubble UPnP server every time you want to use this. To load it on boot, you need to create a systemd service file. Go to the following directory: /etc/systemd/system/ and create a file called bubble.service (or whatever else is memorable for you) and enter the following text in it.
[Unit]
Description=BubbleUPnPServer
After=network.target

[Service]
ExecStart=/bin/sh /opt/BubbleUPnP/launch.sh
Type=simple
RemainAfterExit=yes

[Install]
WantedBy=multi-user.target
Once you're done, exit and just run
systemctl enable bubble.service
and now, every time you boot, Bubble UPnP server will start automatically in the background without any intervention from you.
The final program that I was interested in installing is a VPN/SSH Tunnel solution. I decided to go with a VPN solution because I only wanted to use it for accessing webpages.12 The best known one is called OpenVPN and can be installed using these official instructions. Another set of instructions that I found useful as well - was here at NyxBox. If you follow each step carefully, you should have an OpenVPN server and client setup pretty easily. However, one problem that you will face is forwarding web page requests from the client though the server to the larger Internet. The solution is to setup proper routing. In my case I had to run the following commands:
echo 1 > /proc/sys/net/ipv4/ip_forward
iptables -t nat -A POSTROUTING -s 10.8.0.0/24 -o eth0 -j MASQUERADE
If all works fine, namely that you're able to connect to the Internet through your client after setting up a VPN connection through your server, then save the iptables rule by entering
iptables-save > /etc/iptables.rules
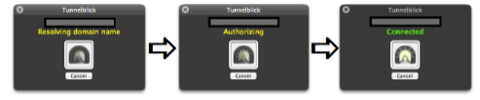
Since I use a Mac, I tested out the VPN connection by downloading a program called Tunnelblick. To get this program running properly, remember to copy the OpenVPN client configuration, certificate, key and the TA.key from your OpenVPN installation on the program to your Mac and point Tunnelblick to it8.
I also wanted to setup an OpenVPN client on my Nexus 4. I followed the same principle of copying the configuration file, certificate, key and TA.key to a folder on my phone and then pointing the OpenVPN for Android client to it. Again, connect and check that everything is running as it should be.

Voila! You now have a cutting-edge setup for remote access/local media streaming/remote media streaming/torrent downloading, all setup using a dinky USD20 dollar device that draws just 4W of power. Isn't technology great? Setting all of this up over the past week has really made me amazed and grateful at all the hard work put in by hundreds of open-source programmers in making these programs that put the 'personal cloud' within the reach of all of us. Do show your appreciation by making a small donation to the ArchlinuxARM guys!9
Well. If you still feel the need to tinker after all this (and I'm trying my best not to!), some other interesting programs to consider installing on your PogoPlug are:
- OwnCloud, which allows you to setup a personal file-sharing service like Dropbox
- s3tools, which allows you to use the Amazon S3 services from your PogoPlug10
- The quadruple-package of SabNZBD, Couch Potato, Headphones and Sickbeard, if you're into using news servers for your downloading requirements11
-
Please note that these instructions are for a very specific model of the PogoPlug. Check your model number against the guide before proceeding! ↩
-
Why not install it all on a large external HDD? The reason I think this is a bad idea is because you'd be putting all your eggs in one basket. If you have separate hard disks for the OS and media, a failure in one will not affect your access to the other. You can also recover from the failure much more quickly (though not if you lose all your media as has happened to me a couple of times already!) ↩
-
Remember to run this command as well in case you are not able to get it working. This has to be run from the PogoPlug itself. Also, remember to do all the other steps outlined in the instructions from another computer, and not on the PogoPlug itself. Very Important!:
/usr/sbin/fw_setenv usb_rootfstype ext3 ↩
-
Changing Transmission settings is a fiddly process. Go here if you want more information - Transmission Wiki ↩
-
It's best to setup your router so it assigns a specific IP address to the PogoPlug when it gets on the network through an option called DHCP reservation. If your router has this option, all you need to know is the MAC address of your PogoPlug ↩
-
The key ingredient in this, which I'm not covering because there are so many articles/how-tos on this, is port forwarding. You need to setup your router's port forwarding program so that any incoming request on specific ports that you want to access on PogoPlug - for example, port 10000 as required by Webmin, are forwarded to the corresponding port on the PogoPlug. This also requires that the PogoPlug on your network has a specific IP address because otherwise the router won't know where to send this request. That's why DHCP reservation is important ↩
-
Thanks to India's abysmal 3G connections and the slow processor on the PogoPlug, streaming video will have to wait for a while longer! ↩
-
Remember to make sure that all these files are in the same directory. Tunnelblick is very finicky about file paths. Also a simple copy command might not work. You will have to use scp to copy the files on to your flash drive or computer ↩
-
I cannot seem to find donation pages for the other programs that I've used (OpenVPN, BubbleUPnP have paid programs so am skipping them). Would appreciate if people can point me to donation pages for the other programs and I'll update accordingly ↩
-
I have this installed and plan to use it to take regular backups of my PogoPlug and store it on my personal Amazon S3 bucket ↩
-
I did install all of them but then uninstalled because I did't think it was worth the trouble (and the overhead) ↩
-
SSH tunneling allows you access to a lot more services (FTP/Telnet/Jabber etc.) but since I only wanted webpage access, I went with the VPN ↩
Category: Gadgets