An Raspberry-Pi based audio streamer for your HiFi system
Wed 30 October 2013
Some weekend DIY audio!
For a long time I've been planning to get my father's old Luxman LV-112 amplifier and Bose Acoustimass AM-5 Series 1 speakers working again and connected to the Pogoplug media server that I had set up on my local network. One hitch in this process was that the amplifier only seemed to have 1 channel working properly, an issue that was easily rectified by a local audio electronics repair shop1 thankfully!
The next step was to figure out how to get audio streaming from the PogoPlug to the amplifier, which was in a separate room over 30 feet away. A search for wireless DACs threw up options such as the NuForce Air DAC (ranging from USD120-160), the Arcam rBlink (GBP 160, but unfortunately Bluetooth only), and what seemed to be the best (and moderately affordable) wireless DAC available now - the AudioEngine D2 (USD 499 for a pair of transmitter and receiver)2. Since this was an experiment and as I lacked the dough, I had no option but to look for more DIY alternatives12.
A clear solution was to use an affordable USB-only DAC connected to a wireless-enabled small computer.
Setting up a Wireless PC + USB DAC
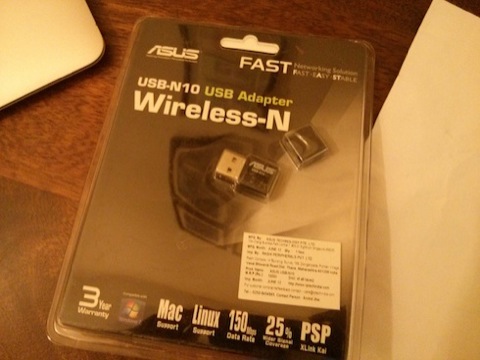
For the former, I looked at expensive (for me) options ranging from the AudioQuest Dragonfly (USD 249, now reduced to USD 199), the ODAC (USD 99 for just the pre-assembled PCB to USD 159 for a fully-cased version with RCA outputs) and finally, the HiFiMeDIY USB DAC with external PSU (for USD 69 without PSU). Since this was an experimental installation, I chose to go with the cheapest option, the HiFiMeDIY DAC which supports 24 bit/96 kHz playback9 to make sure that things would work well before investing too much upfront. The key plus points for this DAC in my opinion are:
- It has 2 RCA outputs which can directly connect to your amplifier
- It has an external PSU, which means you don't have to depend on the limited power that the Raspberry Pi's USB port puts out

For the latter, it was a toss-up between the RaspberryPi (USD 35 for the Model B) and the BeagleBone Black (for USD 45)10. Unfortunately, all the hype about the RaspberryPi (and similar boards such as the Beaglebone Black) does hide one key fact - that you need to spent another USD30-40 just to get them functional enough. In my case, I also had to get:
- A case for USD10 (and these go up to USD 20-30 depending on material and polish)
- A USB WiFi dongle for USD15
- A power supply - I used a micro-usb phone charger that I had lying around but if you don't, thats another USD 10-15 (and make sure you get a version that puts out at least 1A at 5VDC)
- A 4GB SD card to load the Linux distro on (USD5-15 depending on SD Card Class - I bought a cheap Class 10 card)

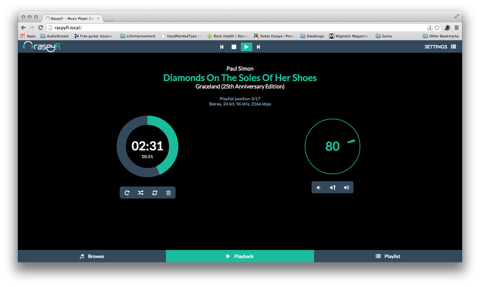
I chose to go with the RapsberryPi because I had come across RaspyFi, a Linux distro specifically designed for audio playback applications on the RaspberryPi5. RaspyFi's core application is the Music Player Daemon7, that has some features I was interested in:
- Lightweight and capable of running headless (i.e. without a GUI interface)
- Support for lossless formats like FLAC and Apple Lossless
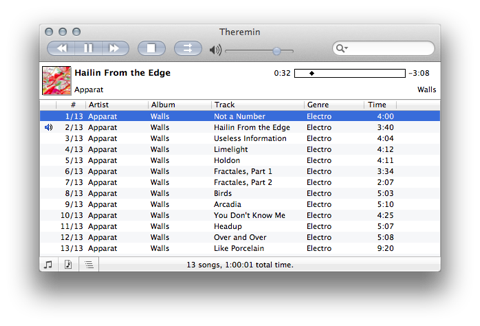
- Clients available for Mac3 and Android4
- Ability to encode and stream music over the Net on-the-fly6
Once this decision was made, setting up the RaspyFi distro was the next step. This is thankfully dead simple, because it just involves writing the RaspyFi disk image onto your brand new SD card. For Windows users, its simplest just to follow the official RaspyFi install instructions. For Mac users, use these instructions and just substitute the RaspyFi image for the official RaspberryPi image mentioned. Once you're done with this step:
- Insert the SD card into the RaspberryPi
- Hook up an Ethernet cable from your router to the RaspberryPi
- Switch on the power. Your Pi should start off a Xmas display of flashing LEDs to show that its on, and that it is connecting to your local network
- Open up your router web admin page and locate the IP address allotted to the Pi 5. Use the IP address to SSH to the Pi from your computer with
ssh pi@192.168.1.102(or whatever the IP address of the Pi on your local network is) and using theusername:piandpassword:raspberry
The next step is to setup the USB WiFi dongle. Just plug it in to one of the two USB ports on the Pi, and follow the self-explanatory instructions from the RaspyFi team. From the RaspyFi forums it seems that most people have had plug-and-play success using a WiFi dongle based on the Realtek 8188CU chipset. I would recommend therefore that you also look at getting a dongle based on this chipset.
The final step is to connect the USB DAC to the remaining port on the
RaspberryPi. To make sure that it has been auto detected, just run alsamixer,
and you should see a screen like below. RaspyFi does support a wide range of DACs
out of the box, but it should be noted that for Asynchronous USB support, the compatibility seems
to be limited right now to mostly XMOS-based USB receivers.

Once all of this is setup, just reboot and you will now be able to access the
RaspyFi web UI at raspyfi.local or through http://raspyfi. I'd recommend
setting up the remaining parts of your system, such as the location of your
music folders, making a choice between dynamic IP or static IP for the RaspyFi
etc., through this Web UI. I have had some difficulty on making direct changes
to the configuration files8, so would definitely advise that you stick as far
as possible to using the Web UI for configuring your Pi.
Now you should be all setup and streaming music like I am!
Final thoughts and other ideas
I spent around 2 weekends putting all of this together and have been a happy customer for over a month now. If I take a step back and look at the total cost and effort put into this solution, this is what it looks like:
- At least 2 8-hour days to setup the system and sort out kinks such as spotty WiFi reception, having MPD mount my remote drive properly, updating the base Raspberry Pi install and then rolling it back to the original RaspyFi distro image due to issues faced after the update etc. Since this was done over weekends, lets assume the opportunity cost of this time was USD100 at least
-
Total hardware costs of USD 160
- Raspberry Pi - USD 35
- Case - USD 10
- Power supply for the Pi - USD 5
- SD Card - USD 10
- WiFi dongle - USD 15
- USB DAC - USD 70
- Power supply for USB DAC - USD 10
- Assorted USB and RCA cables - USD 5
The total cost of this project is thus at least USD 260-300. It should be noted that the project might not meet an audiophile's definition of HiFi audio given that:
- The core of this project is the Raspberry Pi that has not been optimised for audio
- The project consists of 2 boxes and many wires running round, so not exactly something that will blend into a nice rack of HiFi equipment
Given the time, costs and audiophile considerations, and options such as aforementioned AudioEngine D2 or even the discontinued Squeezebox Classic (~USD 200-300 used on Ebay) or Squeezebox Touch (~USD 300 used on Ebay or over USD 600 for NIB units), one should really look into the costs and benefits of implementing a project like this. In many cases, its just way simpler to buy off the shelf and you are not necessarily paying a lot more.
For me the decision was made easier given my budget constraints and my interest in wanting to try this out. However, the experience of and associated research during this project (and thereafter) has given me some ideas that I will implement if I had to do this again:
- Instead of getting the Raspberry Pi + WiFI dongle, I'd look at getting a WiFi-enabled board like the Wandboard Dual (available for USD 99) or the Cubox-i2 Ultra (which would be my choice). This is simply because it'd have far better WiFi signal
- I'd try out the Voyage MPD distro, which has a customised version for the Cubox-i and the BeagleBone Black, just to check how it compares with the RaspyFi in terms of audio quality and ease of use
- The next time, I'd also try to create a custom enclosure to box the PC board, the DAC11 and a power supply. Possibly also augment it with an Arduino-powered VFD display and a good quality chip amp
All these ideas will definitely take the total cost of version 2 of this project way over that of a mid-grade solution, but the fun and journey of doing this is worth the cost in my opinion!

-
Since this amp is over 20 years old, the original potentiometer that had gotten busted was not available anyone. A local replacement had to be put in ↩
-
Voyage MPD is an alternative distro that I came across later. I'm not qualified to comment on which is better, but as RaspyFi is working smoothly for me, I've controlled my urge to tinker further and am just sticking to it ↩
-
To be honest, I've not been able to get this working properly yet despite several weekends of effort. One key issue is that the RaspberryPi just does not have the steam to encode high-resolution files down to a streamable size on the fly (64/96 kbps for example) ↩
-
RaspyFi also comes with support for Minidlna (another media server that does video streaming as well) and Shairport for Airport emulation (to stream music from Apple devices to connected speakers). I don't use the former as my media server already has a Minidlna server running and the latter works really poorly on my network - I don't know if its an issue with the WiFi latency or whether the program itself is not setup properly ↩
-
Because I assume that the MPD server and the Web GUI server has been customised to accept a certain structure to these files ↩
-
I was satisfied with this spec as 99% of my music collection is just vanilla 16 bit/44.1 kHz files (as I suspect is the case with many others) ↩
-
Here's a good tutorial on setting up something similar for the BeagleBone Black ↩
-
A good quality Sabre 9018 DAC board from Ebay ↩
-
Though I'd have really stumped for the Audioengine D2 if I had cash to save time and effort and get a nicely designed single-box solution ↩
Category: Gadgets